There’s nothing quite like the irresistible aroma and satisfying crunch of freshly popped popcorn. While microwave bags offer convenience, and air poppers boast a healthier profile, for that truly authentic, movie-theater-quality snack, a Hot Oil Popcorn Maker reigns supreme. It’s not just about popping kernels; it’s about crafting an experience, delivering a perfectly textured, flavor-infused treat right in your own kitchen.
What Makes a Hot Oil Popcorn Maker Special?
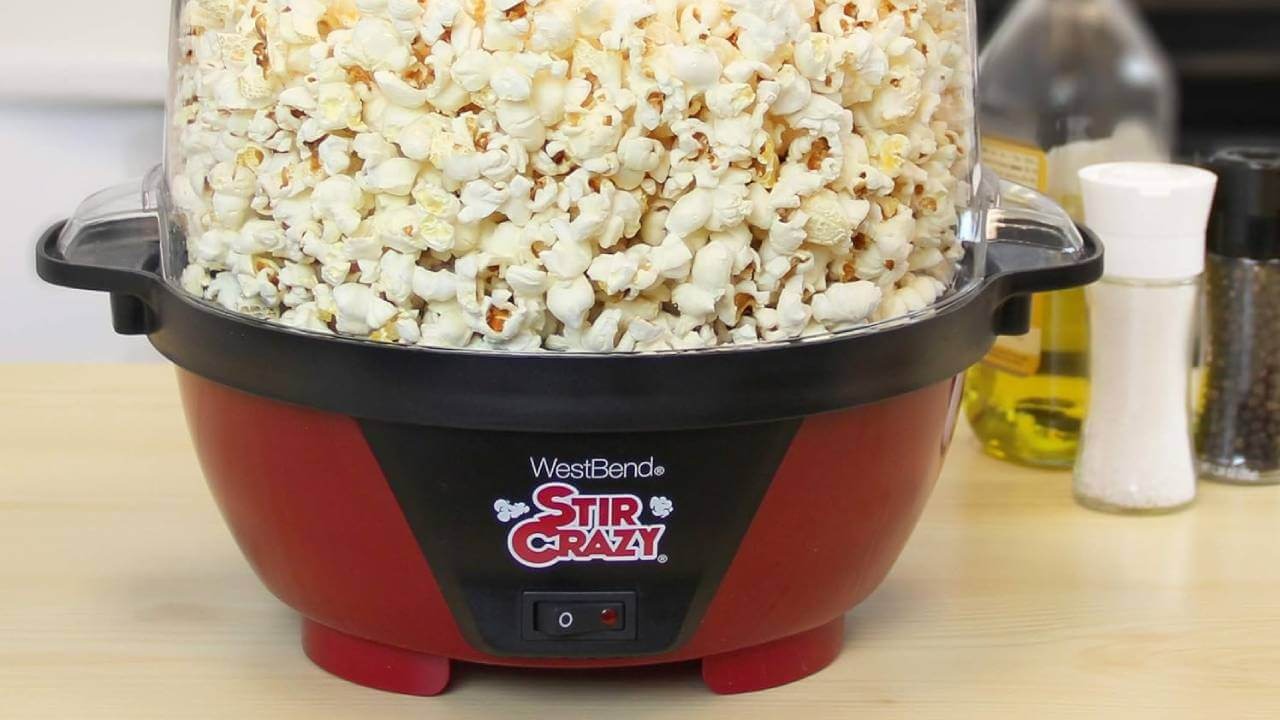
At its core, a hot oil popcorn maker utilizes a heating plate or kettle, combined with a precise amount of cooking oil, to pop kernels. Many models feature a built-in stirring arm that continuously moves the kernels, ensuring even heat distribution and preventing them from scorching on the bottom. This method of heat transfer through oil is the secret sauce, literally and figuratively, to achieving popcorn that’s wonderfully crisp on the outside and tender on the inside.
“For that authentic, perfectly coated, crispy popcorn experience, a hot oil popcorn maker is simply unmatched,” says Dr. Eleanor Vance, a food science expert specializing in snack preparation. “The oil not only facilitates even popping but also acts as a flavor carrier, allowing for a depth of taste you just can’t achieve with dry popping methods.”
The use of oil helps to create a richer flavor profile, mimicking the taste and texture of popcorn found at concession stands. It also aids in significantly reducing the number of unpopped kernels, ensuring you get more delicious popcorn from every batch.
Hot Oil Popcorn Maker vs. Air Popper: A Flavor Showdown
The choice between a hot oil popcorn maker and an air popper often sparks a debate among popcorn enthusiasts. Each has its distinct advantages and disadvantages.
Pros of Hot Oil Popcorn Makers:
- Superior Taste and Texture: The oil infuses flavor into the kernels as they pop, resulting in a richer, more satisfying, and often crispier bite, akin to classic movie theater popcorn.
- Fewer Unpopped Kernels: The consistent heat from the oil and the stirring mechanism lead to a very high pop rate, minimizing waste.
- Better Seasoning Adhesion: The slight oil coating on the popped corn helps salt, butter, and other seasonings stick much more effectively, leading to a more evenly flavored snack.
- Versatility in Flavor: You can experiment with different oils (like coconut, canola, or even a hint of sesame oil) to add unique base notes to your popcorn.
Cons of Hot Oil Popcorn Makers:
- Higher Calorie and Fat Content: While you control the amount and type of oil, it inherently adds more calories and fat compared to air-popped corn.
- More Involved Cleanup: Oil residue can make cleaning a bit messier than a dry air popper.
- Initial Heat-Up Time: Some models require a brief preheating period for the oil to reach optimal temperature.
- Unit Gets Hot: Like any cooking appliance involving hot oil, the unit can get quite warm during operation.
Pros of Air Poppers:
- Healthier Option: No oil is used for popping, making it a lower-calorie, lower-fat snack.
- Faster Popping: Air poppers often pop kernels very quickly.
- Easy Cleanup: Without oil, these machines typically require just a quick wipe-down.
Cons of Air Poppers:
- Drier Texture: Popcorn can be drier and less flavorful due to the lack of oil during popping.
- Poor Seasoning Adhesion: Seasonings tend to fall off more easily from dry air-popped corn.
- Butter Melting Issues: Integrated butter melting trays often struggle to melt butter fast enough or distribute it evenly.
Ultimately, if rich flavor, satisfying texture, and efficient popping are your top priorities, a hot oil popcorn maker is the clear winner for creating that authentic cinematic experience at home.
Choosing Your Perfect Hot Oil Popcorn Maker
When selecting a hot oil popcorn maker, consider your specific needs and preferences. These machines come in several forms:
- Electric Stirring Poppers: These popular countertop models feature a heating plate and a motorized stirring arm. They are convenient, typically have high pop rates, and often include a clear dome that doubles as a serving bowl, simplifying cleanup.
- Stovetop Poppers: Manual models, like the classic Whirley-Pop, are used on your stovetop. They offer excellent control over heat and allow for a traditional popping experience with a hand crank to stir the kernels.
- Theater-Style Popcorn Machines: For the ultimate indulgence or larger gatherings, these machines resemble the commercial units found in cinemas, complete with a kettle, warming deck, and often a nostalgic aesthetic.
Key Features to Look For:
- Capacity: How much popcorn do you typically need? Makers range from personal sizes (4-6 cups) to party-sized (16-24 cups or more).
- Stirring Arm Quality: A robust, effective stirring mechanism is crucial for even popping and preventing burning.
- Serving Bowl Integration: Many electric models feature a clear plastic dome that flips over to become a serving bowl, a convenient feature.
- Ease of Cleaning: Look for models with non-stick surfaces or removable parts that are easy to wipe down.
Mastering Your Hot Oil Popcorn Maker: A Step-by-Step Guide
Using a hot oil popcorn maker is straightforward, but a few simple steps ensure perfect results every time.
Essential Ingredients and Tools
Before you start, gather your ingredients: high-quality popcorn kernels and your chosen cooking oil. You’ll also need your popcorn maker, a measuring cup, and a large serving bowl (if your maker doesn’t double as one).
Preheating the Oil: The Test Kernel Method
Most hot oil makers benefit from preheating the oil slightly before adding all the kernels. This helps ensure consistent popping.
- Add Oil: Pour 1 to 2 tablespoons of high-smoke-point oil (like coconut or canola) for every half cup of kernels into the popping chamber.
- Add Test Kernels: Place just two or three popcorn kernels into the oil.
- Heat: Turn on your popcorn maker. Wait for these test kernels to pop. This indicates the oil has reached the ideal temperature for popping.
Adding Kernels and Popping
Once your test kernels have popped, you’re ready for the main event.
- Add Remaining Kernels: Quickly add the rest of your measured popcorn kernels (typically 1/2 cup for most home models) to the hot oil.
- Cover: Secure the lid. If your machine has an automatic stirring arm, it will begin to rotate, evenly coating the kernels.
- Listen and Wait: The popping will begin rapidly. Listen closely. Once the popping sounds slow to about one pop every two to three seconds, turn off the machine and unplug it immediately to prevent burning.
- Serve: Carefully pour the fresh popcorn into a serving bowl. If your maker’s lid doubles as a bowl, simply invert it, remove the base, and serve.
Safety Tips
Always ensure your popcorn maker is on a stable, heat-resistant surface. Never leave the machine unattended while it’s operating. Allow the machine to cool completely before attempting to clean it.
The Best Oils for Hot Oil Popping
Choosing the right oil is crucial for flavor and performance.
- Coconut Oil: This is the gold standard for movie-theater-style popcorn, imparting a subtle, rich flavor and contributing to a fluffy texture. Look for butter-flavored coconut oil for an extra authentic touch.
- Canola Oil: A neutral, high-smoke-point oil that won’t interfere with your popcorn’s flavor, making it versatile for various seasonings.
- Vegetable Oil: Similar to canola, it’s a good all-around choice for popping.
- Grapeseed Oil or Avocado Oil: These oils have very high smoke points, making them excellent choices for hot oil popping, and they offer a healthy fat option.
Oils to Avoid: Butter, margarine, or oils with low smoke points (like extra virgin olive oil) are not ideal for popping as they can burn easily, leading to unpleasant smoky flavors and potentially damaging your machine. It’s best to add butter after the popcorn has popped.
Elevate Your Snack: Creative Popcorn Recipes and Flavor Twists
While a sprinkle of salt is always a classic, your hot oil popcorn maker opens up a world of flavor possibilities.
Classic Salty Goodness
- Flavacol Boost: For that iconic movie theater taste, a pinch of Flavacol (a finely ground, butter-flavored popcorn salt) added with your kernels and oil is transformative.
- Buttered Perfection: Melt real butter separately and drizzle it over your freshly popped corn, then toss with fine-grain popcorn salt for even coverage.
Sweet Treats
- Caramel Popcorn: After popping, coat your popcorn with a homemade or store-bought caramel sauce.
- Cinnamon Sugar: Toss warm popcorn with a mixture of sugar and ground cinnamon for a delightful sweet snack.
Savory Sensations
- Cheesy Delight: Nutritional yeast provides a cheesy flavor and is a healthier alternative, or use finely grated Parmesan cheese.
- Herb Infusion: Mix dried herbs like rosemary, thyme, or oregano with garlic powder and a touch of salt.
- Spicy Kick: Add cayenne pepper, chili powder, or smoked paprika for a warming sensation.
- Taco Popcorn: Toss with your favorite taco seasoning blend.
“Don’t be afraid to experiment! The beauty of homemade hot oil popcorn is the blank canvas it provides for culinary creativity,” advises chef Marcus Thorne, known for his innovative snack concepts. “From sweet and spicy to tangy and umami, your popcorn maker is just the start of a flavor adventure.”
Cleaning and Maintenance for Longevity
Proper cleaning and maintenance are essential for ensuring your hot oil popcorn maker lasts for years and continues to produce delicious popcorn.
- Cool Down First: Always unplug the machine and allow it to cool completely before attempting any cleaning. This typically takes 20-30 minutes.
- Remove Detachable Parts: Many electric models have removable stirring arms, lids, and other components. Take these apart for easier cleaning.
- Gentle Cleaning: For the main popping chamber, wipe away any oil residue with a paper towel. Then, use a soft cloth or sponge with warm water and a mild dish soap. Avoid abrasive scrubbers that could damage non-stick coatings. Some kettles are removable and can be washed in the sink.
- Wipe Down Exterior: Use a damp cloth to wipe the exterior surfaces and clear dome or glass panels, removing any grease or fingerprints.
- Dry Thoroughly: Ensure all parts are completely dry before reassembling or storing to prevent water spots or rust.
Regular cleaning prevents oil buildup and ensures your popcorn always tastes fresh and clean.
Why Homemade Hot Oil Popcorn is the Ultimate Treat
Beyond the superior taste and texture, choosing a hot oil popcorn maker offers several compelling benefits:
- Ingredient Control: You decide exactly what goes into your popcorn, avoiding artificial flavors, preservatives, and excessive sodium often found in pre-packaged options. This allows you to make a snack that aligns with your dietary preferences, whether you’re focusing on healthier fats or reducing salt intake.
- Cost-Effective: Buying bulk kernels and oil is significantly cheaper than repeatedly purchasing microwave popcorn bags or store-bought ready-to-eat popcorn.
- Family Fun: Making popcorn at home can be a delightful activity for families, creating shared memories and a sense of accomplishment. Kids often love watching the kernels pop and choosing their own seasonings.
- Customization: The ability to customize flavors, from a simple sprinkle of sea salt to gourmet caramel or spicy blends, means you’ll never get bored.
With a hot oil popcorn maker, every movie night, party, or casual craving can be transformed into a special occasion, delivering fresh, warm, and perfectly popped corn that truly hits the spot.
Your Hot Oil Popcorn Maker Questions Answered
Q: Can I use butter during popping in a hot oil popcorn maker?
A: It’s generally not recommended to use butter during the popping process in a hot oil maker. Butter has a low smoke point and contains milk solids that can burn quickly, imparting an unpleasant flavor and creating residue in your machine. For the best taste and machine longevity, melt butter separately and drizzle it over your popcorn after it has popped.
Q: How much oil should I use for popcorn?
A: A good general guideline is to use 1 to 2 tablespoons of high-smoke-point cooking oil for every 1/2 cup of unpopped popcorn kernels. This ratio ensures even heat distribution and contributes to the popcorn’s delicious flavor and crisp texture.
Q: What’s the best type of popcorn kernel for a hot oil popper?
A: While most standard popcorn kernels work well, look for “gourmet” or “butterfly” kernels for larger, fluffier popcorn. “Mushroom” kernels are rounder and denser, often preferred for candy-coated popcorn. Orville Redenbacher kernels are also frequently recommended for reliability and yield.
Q: How do I prevent my popcorn from burning?
A: To prevent burning, ensure you use enough oil, preheat the oil properly with a few test kernels, and most importantly, turn off the machine as soon as the popping slows significantly (to about one pop every few seconds). Do not leave the popcorn in the hot kettle or on the heating plate after it’s done.
Q: Is hot oil popcorn healthier than microwave popcorn?
A: In many cases, yes. While hot oil popcorn uses oil, you have full control over the type and amount of oil and salt. Microwave popcorn often contains hydrogenated oils, artificial flavors, and excessive sodium. By making popcorn with a hot oil maker, you can choose healthier oils like coconut or avocado oil and moderate your seasonings, making it a more wholesome snack.
The Perfect Popcorn Awaits
A hot oil popcorn maker is more than just an appliance; it’s a gateway to gourmet snacking, a tool for creating heartwarming family moments, and a simple pleasure that elevates any occasion. By understanding its unique advantages, mastering its use, and exploring creative flavor combinations, you’re not just making popcorn – you’re crafting an experience. So, plug in your maker, choose your favorite oil and kernels, and prepare to enjoy the kind of perfectly popped, richly flavored popcorn that will have everyone asking for more. The magic of homemade, movie-theater-style popcorn is just a few kernels away.